Summary
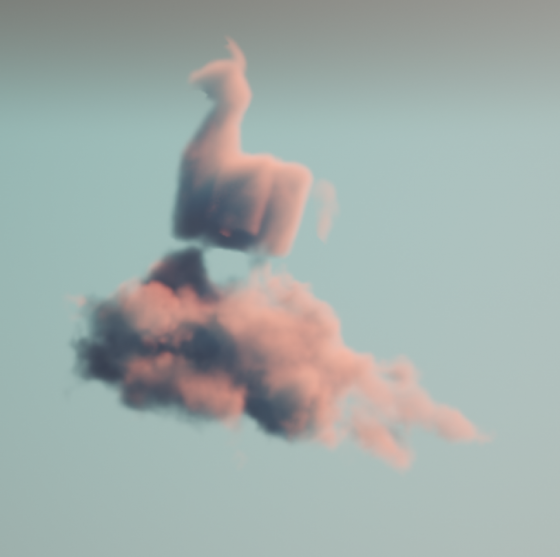
Making beautiful and feasible volumetric effects has been a trending topic for game development. Inspired by the Gears 5 tech talk and the good ol’ Guerrilla paper on cloudspaces, I decided to do my own take and created this fluffy dry ice fog using Volumetric Fog feature that comes with UE4.
https://twitter.com/Vuthric/status/1226257386131746817
This is done purely within Volumetric Fog and Volume Material systems, thus requires no low-level coding and supports various lighting feature within UE4.
Volumetric Fog
Volumetric Fog has been in Unreal Engine since 4.16. Comparing to custom volumetric raymarcher, which usually only supports one directional light and skylight, UE4 Volumetric Fog supports one Directional Light, any number of Point and Spot Lights, Skylight, all with various shadowing method support like static shadow, CSM, distance field soft shadow and DFAO. It also supports Volumetric Lightmaps and Particle Lights. it’s well embedded into the engine with good performance.

The major downsides include lacking IES support, doesn’t work with Ray Tracing and most importantly, no self-shadow or light scattering for performance reasons. Later we’ll learn some neat tricks to fake self-shadow as a workdaround.
Before Getting Our Hands Dirty
Before starting I need to make clear that what we are going to create is a pretty demanding visual effects. Volumetric fog is targeted for mainstream PCs/Consoles, but in order to express the detailed shapes of dense fog we need to crank up the parameters by quite a bit.
For the sake of demonstration I tuned up the quality by changing cvar:
r.VolumetricFog.GridPixelSize 4
Which costs ~4ms on a 2080Ti (1080p) for the final FX.
Default GridPixelSize value is 8. Half the value means there are 4x more voxels to render for the same screen resolution. And because we’ll do multiple texture sampling per voxel it costs even more. Final fog is about 8 times as much consuming than regular volumetric fog at high quality (as in the video); 2 times as much consuming at default quality.
It’s important that you understand this. For learning’s purpose, you can maximize the quality as long as your machine runs it smoothly.
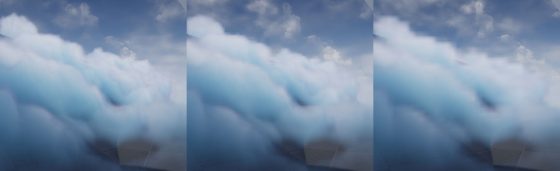
Click to zoom in
I’ll talk more about optimization in the last section of this article. You can tweak it to fit your needs but most importantly, after going through this project you’ll learn about great ways to control volumetric fog in 3D space, which may also be used on top of other VFX to achieve richer, thicker atmosphere.
Local Controls
Firstly you still need to setup your Exponential Height Fog actor and enable its Volumetric Fog option. Decrease the density to 0.00001 and change fog actor location to (0, 0, -9999999) if you don’t want global fog.
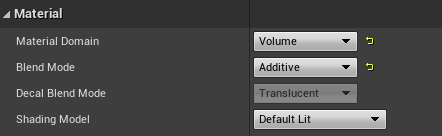
Materials using the Volume domain describe Albedo (color), Emissive, and Extinction (opacity) for a given area in space for the volumetric fog. For example you can create a 3D sphere with simple SphereMask by hooking up Absolute World Position, Object Bound to SphereMask node.
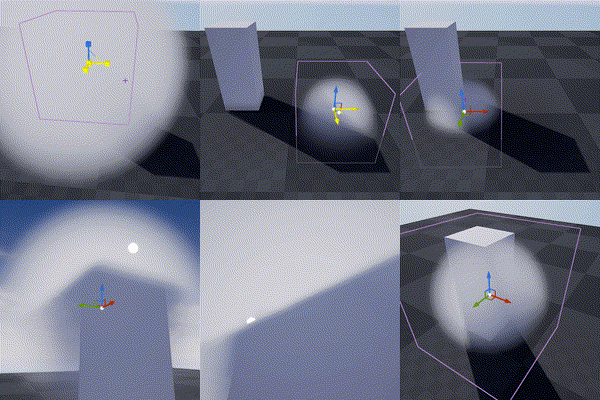
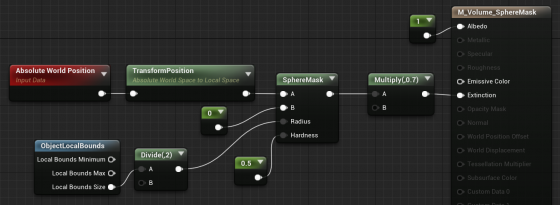
The material is applied to a cube mesh. Normals of the cube don’t need to be inverted. Two-sided material is not needed either. In fact it doesn’t even matter if it’s not a cube. Engine only uses the bounds of the mesh for if it uses Volume material.
Knowing this we can do all sorts of fun tricks. Let’s start with the basics:
3D Noise

The obvious step forward is adding 3D noise. Since multiple voxels are computed for every [GridPixelSize*GridPixelSize] pixel grid on screen. The Volume material needs to be fast. For the Noise node, Fast Gradient – 3D Texture option is our only bet here.
And we can easily get this low hanging fruit of a volume effect by using the material above:
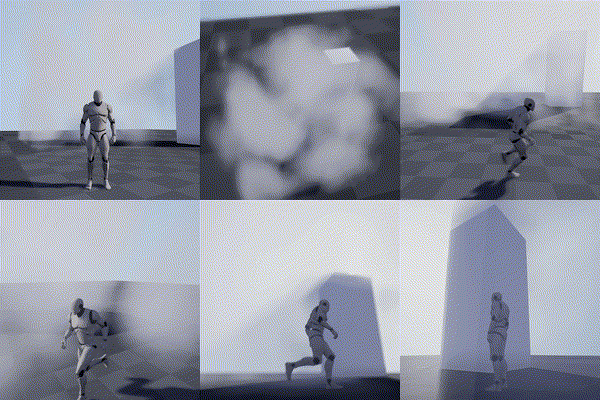
Fake Godrays
This section is not required for the fog effect we aim to achieve, but it’s a great example of using simple math to achieve nice looking and cost efficient results. In this awesome tutorial by Sjoerd De Jong from Epic, he mentioned a method to add artificial god rays which gives the light a lot of rich details.
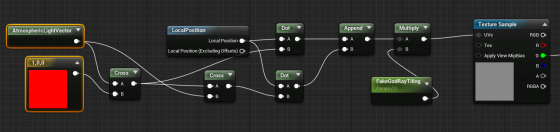
Basically you use cross operator to get two vectors that are perpendicular to the light vector and perpendicular to each other. Then use them as UV input for a perlin noise texture. This projects the 2D texture along the light direction:
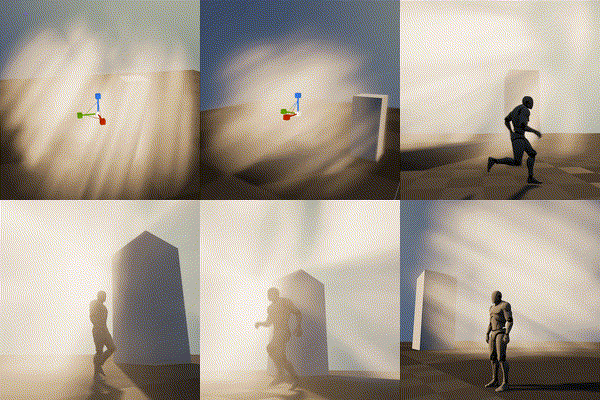
A more practical demonstration from my tech talk (link, it’s in Chinese):

Because I love giving badass names to my demos
Now you may notice the nice looking dense cloud movement on the ground. That’s was my first attempt at creating this effect 🙂

Dense Cloud
As mentioned earlier, dense Volumetric Fog doesn’t work very well because we lack self-shadowing, while on the bright side, it integrates well with engine lighting features. We can fake shadows in various ways then cover up the flaws with lighting and animation.
Here is a list of missions we need to accomplish:
- ‘Ground’ the volume to surface
- Create Cloud like patterns and behavior
- Fake self-shadow
- Achieve good enough performance so people have a chance to see it in you game
Distance Function
In the Gears 5 talk, Colin mentioned they generated heightmaps for their maps, which are then piped into the Volume Material to act as a mask. This basically says okay we got nice 3D cloud in the air but fade it out when it’s far away from the ground.
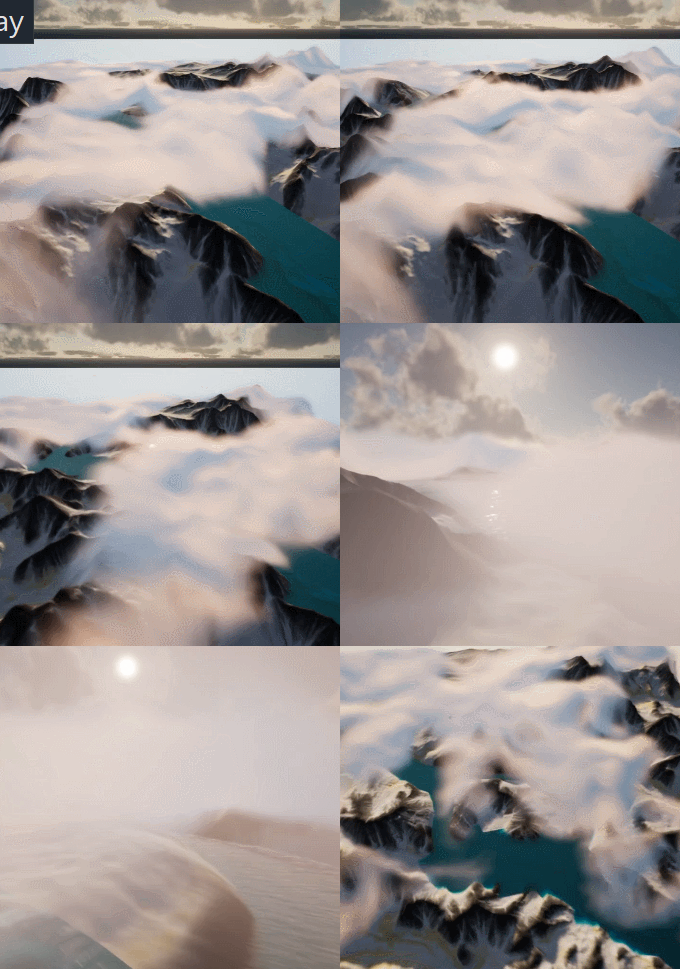
A quick example showing dense cotton candy blowing over mountain tops
For this article though, we are going to use Distance Field instead of heightmap for simplicity’s sake (heightmap is faster but custom tools are needed to generate them).
After turning it on. We can simply use Distance to Nearest Surface node to access global distance field data in the material graph:

Note that Global Distance Field only generates as far as 395.75 cm to any surface (balance between range and precision). So it’s doesn’t really work for huge scale FX like the mountain Cotton Candy (I simply used the landscape heightmap there).
A Brief on Volume Textures in UE4
Now we know how Volume Material works and how it can interact with the scene, the gracious time has come to talk about 3D textures. Unreal Engine 4 has added Volume Texture support since 4.21. It works by taking a 3D shape and slicing it into cross-sections, which are then placed into a grid on a 2D Texture. Volume Texture asset can automatically convert the 2D texture into a 3D one.
Volume Texture imported from Houdini
(Optional part, read if you are interested in VDB)
It’s also possible to feed a function into UVolumeTexture::UpdateSourceFromFunction() to read from VDB files directly. Here is an example I did a while back that imports a single VDB file into a Volume Texture asset.
Note: This is a very experimental test and it only supports older VDB files since I imported OpenVDB library from UE4 ProxyLODPlugins.
    auto QueryVoxel = [&](const int32 x, const int32 y, const int32 z, void* ret)
    {
        openvdb::Coord xyz(x + Start.X, y + Start.Y, z + Start.Z);

        if (TextureFormat == ETextureSourceFormat::TSF_G8)
        {
            uint8* const Voxel = static_cast<uint8*>(ret);
            Voxel[0] = accessor.getValue(xyz) * 256 * ValueScale;
        };
        if (TextureFormat == ETextureSourceFormat::TSF_RGBA16F)
        {
            half* const Voxel = static_cast<half*>(ret);
            Voxel[0] = accessor.getValue(xyz) * ValueScale;
            Voxel[1] = 0;
            Voxel[2] = 0;
            Voxel[3] = 0;
        }
        // Only listing two formats here
    };

    VolumeTexture->UpdateSourceFromFunction(QueryVoxel, End.X - Start.X, End.Y - Start.Y, End.Z - Start.Z, TextureFormat);
    VolumeTexture->MarkPackageDirty();

    return true;
We can choose which texture format we want to save as Volume Texture. Usually 8 bit per channel is good enough for volumetric FX.
This covers how to use one layer of static volume data. To make natural looking cloud of fog, we need to stack multiple layers of 3D noises with a strong art direction, not unlike how we fake water waves with 2D noises (as normal maps or height offset). It’s a very challenging task, fortunately this is a topic that has been experimented with by a lot of super awesome FX artists. I’ll try to sum up what I’ve learned in next sections.
Shaping The Cloud With 3D Noises
Author 3D Noises
There’re multiple ways to create 3D noises. I’m going to first talk about how to create them in Houdini, then introduce a way to generate them in UE4 (4.25 and later) directly.
The reason being, the process is more instinctive in Houdini, there are existing nodes designed specifically for this job. Previewing tweaks is better too. However if you’re not familiar with Houdini or want to keep the workflow fancier, the new Volumetrics plugin coming to 4.25 has legit tools to keep the process inside UE4 kitchen.
Create The Base Layer (with Houdini)
The most important noise layer that immediately yield great result for me is what Guerrilla Games calls Perlin-Worley noise.
As mentioned, Houdini is very powerful for these kind of job and comes with native periodic Perlin / Worley noise nodes. Here is the Volume Vop for periodic Perlin fractal noise:

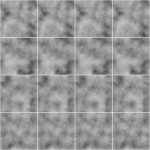
The for loop is a little tricky to use if you’re not familiar with it. Once you got that you can easily generated another periodic Worley fractal noise volume:

then multiply them together:
(You can do this inside a Cop net)
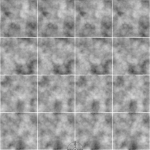
The first Perlin noise uses a very common technique called fBm (fractal Brownian motion), which basically means fractal — you combine noises with different frequencies together to get a more detailed noise while maintaining the macro shape.
Worley noise algorithm is pretty simple. For 3D noise, the voxel value is second shortest distance between the voxel scattered points in space. That gives us this fluffy visual characteristics. When mixed in the cloud volume it can either separate the volume in bubbly sections or give the edge some nice wispy details.
Combining with the distance function technique we mentioned before, the Perlin-Worley noise instantly gives you this clean and detailed look:
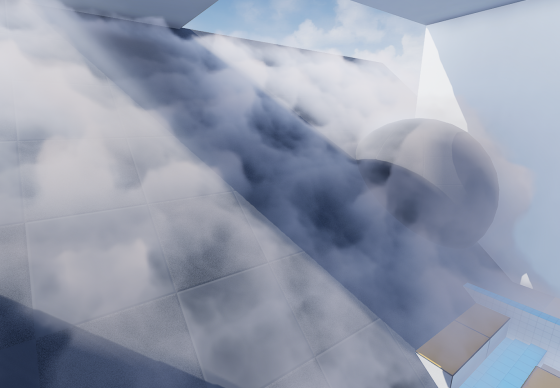
To sample Volume Texture, you treat them as 2D textures but instead of UV(float2) you feed in a UVW(float3) as coordinate in 3D space.
You can spot the consistent visual feature of Perlin noises, also the billow features from Worley noises here, which gives us a solid base shape for the cloud we’ll continue adding details to. Adding panning to the UVW input will instantly give you flowy results if the panning direction is not completely parallel to surface tangent.
Update 2020-07-01: Uploaded the .hip file since a lot of you folks are asking for it and the peer pressure is weighing me down. (actually .hiplc since I only have indie license on my WFH machine)
Create The Base Layer (within Unreal Engine 4)
This is the alternative way to author 3D noises within UE4. This awesome Volumetrics plugin by Ryan Brucks is only available in dev-main branch at the time of writing. You can find BP_Draw_Tiling_volume under Plugins\Volumetrics\Content\Content\VolumeTextures\Blueprints
Usable is pretty straightforward. Click Create Static Texture button to instantly generate a uasset of that. You can dig inside and see how it works.
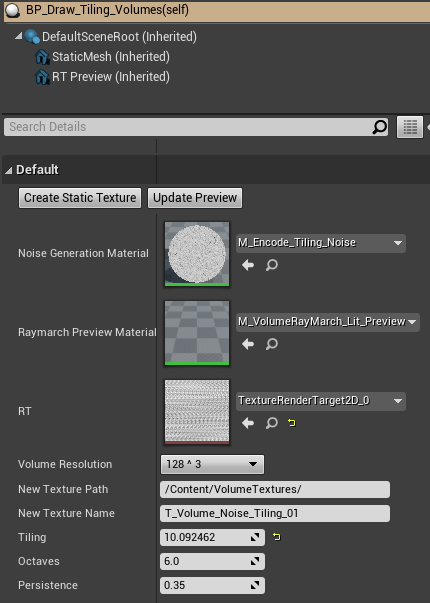
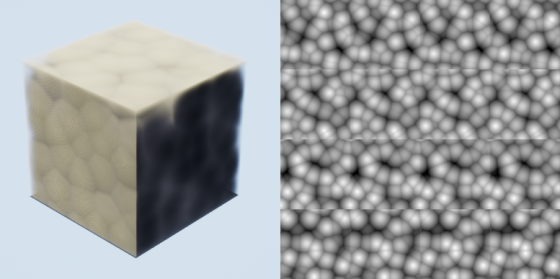
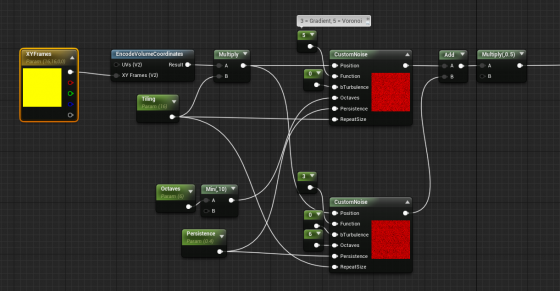
The core function here is M_Encode_Tiling_Noise, which describe the 3D texture it’s going to generate. It doesn’t come with the Perlin-Worley noise as mentioned but we can easily modify it to our heart’s content.
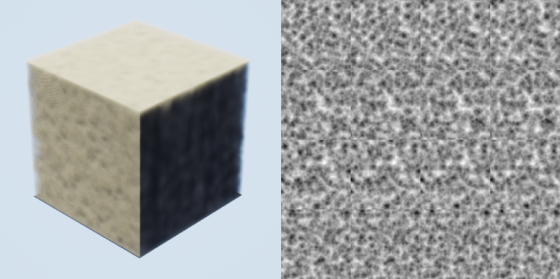
The custom node takes inputs and generates 3D noises, while Function parameter describles the noise type. Default is one gradient 3D noise as output. Here I add a Gradient (Perlin) noise and Voronoi (Worley) noise together then multiply it by 0.5. Hit Create Static Texture button we can achieve similar result as the Houdini one.
Stacking Noises To Replicate Dry Ice Fog Movement
As mentioned before. Worley noise works nicely for both macro and detail shaping. Similar to 2D textures, we can add/multiply layers of 3D noises with different patterns and panning speed to achieve a more dynamic result. To demonstrate this clearly, here’s 2 layers of 2D
panning noises multiplied:
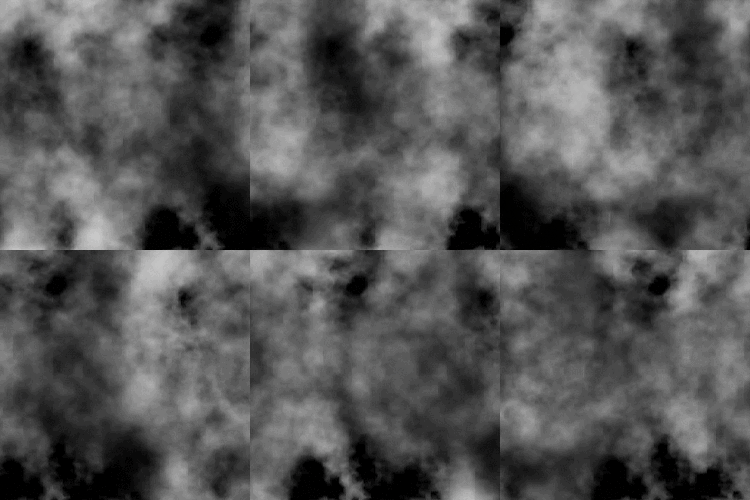
We want similar things in 3D so the fog will appear to be flowing. However, 3D noises are very expensive. For example 512^3 volume texture roughly equals 11.5k*11.5k in 2D and currently UE4 doesn’t support 3D texture streaming. Sampling such large textures multiple times, in multiple voxels, for every [GridPixelSize*GridPixelSize] pixels on screen takes a big toll on the performance.
A better strategy is stacking 3 layers of lower resolution 3D noises (128^3 for example) instead of 2 high resolution. And because the 3 layers have aggressively larger scale, they make up for low resolution:
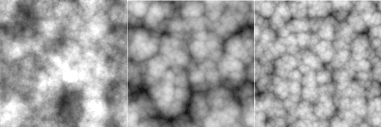
It’s not as detailed, but the extra layer adds a lot more complexity to it so we don’t see any repeated patterns.
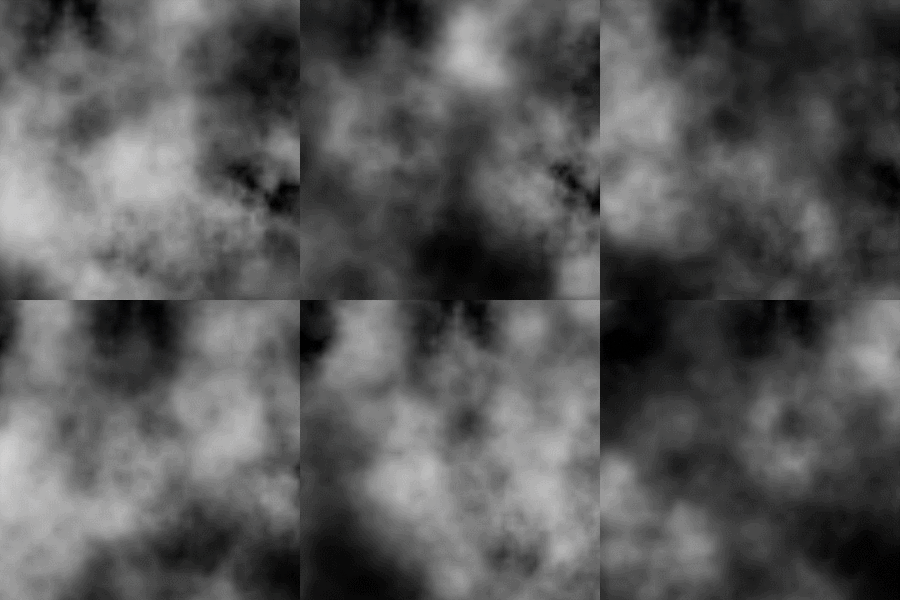
The 3 layers of 3D noises are encoded into RGB channels of a Volume Texture respectively:

With a little tweaking, you’ll manager to get this:
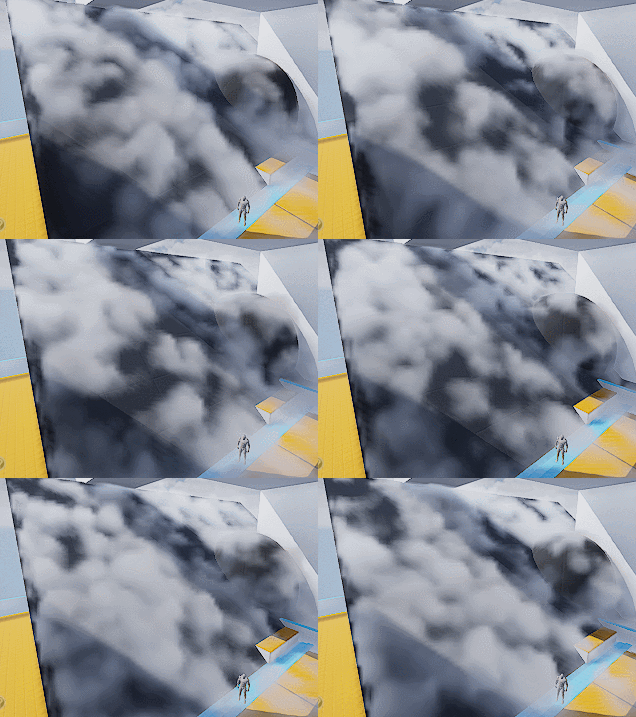
Which looks like absolutely nothing. Here begins the journey of parameters tweaking. Consider this a triumph for your tech art skills. The 3D noise behavior will start making sense when you start hallucinating.
A tip I can give though is to start simple and make sure you get a good base to work with. I spent a lot of time experimenting with the noises and trying to replicate dry ice fog movement, with only two layers of 3D textures (The R and G channels of our volume texture).
Also it’s important to tilt the panning direction away from surface tangent a little. It will result in a more dynamic look since distance field is constantly trimming the 3D noise.
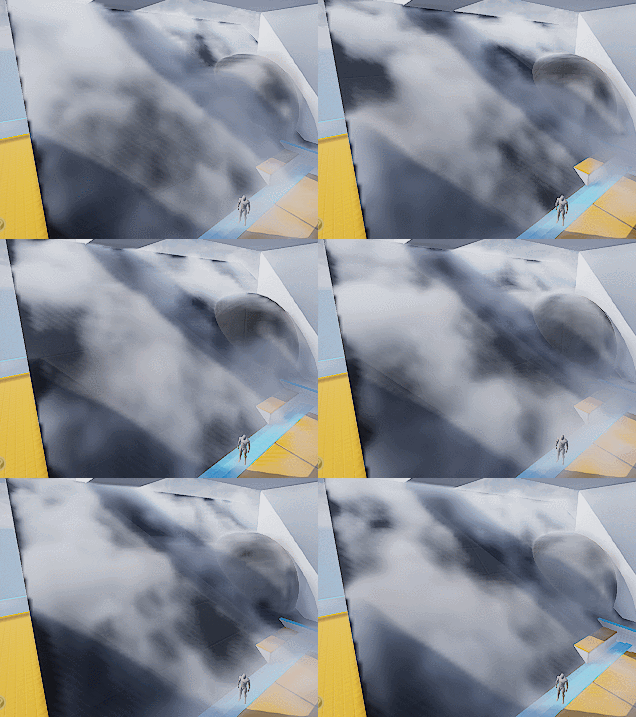
Then add a little details:
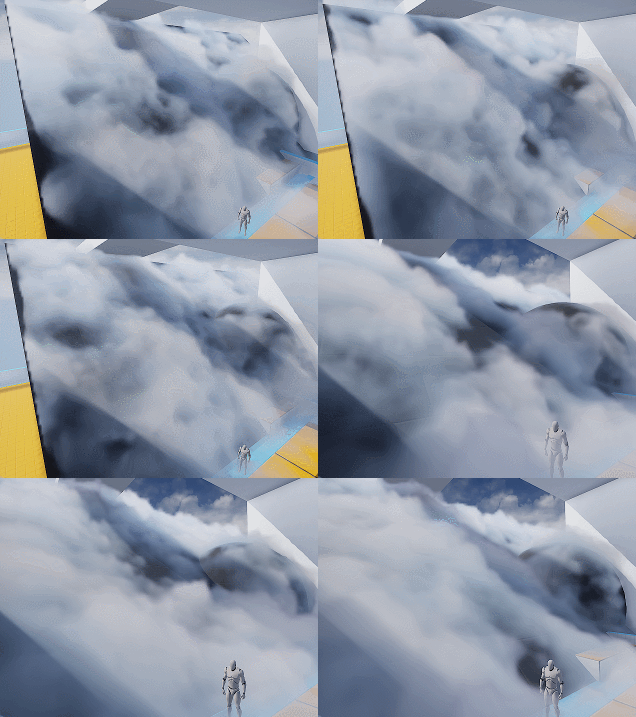
Wait what? I hear you. This feels like a ‘draw the rest of the owl’ situaltion. But the differences between the two are only two changes:
- Two more layers of noise. One of them is B channel of the volume texture, used similar to G channel. The other one is a fine tune ‘modifier’ to add refined wispy edges.
- Shadows. Offset shadow and DFAO.
Which leads to our next sections.
Add Detail – Wispy Edges
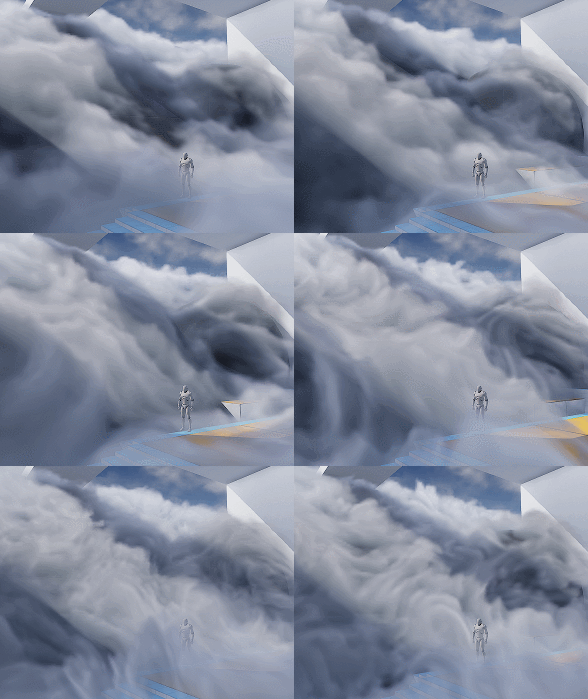
After adding another layer of Worley noise (B channel) you’ll can get something like the left picture (minus shadowing which I’ll cover later).

The overall shape is good but still lacks details. You can then add another layer of noise to A channel, or just reuse other channel to add in high frequency details (middle picture). The pattern is very repetitive but since the moving shape is already very rich, it won’t be noticeable.
Then we want to soften up the details near the ground, since dry ice fog tends to be more volatile the higher it goes (look up videos on youtube), and the slicing artifacts appear worse if the contrast is high near the ground:
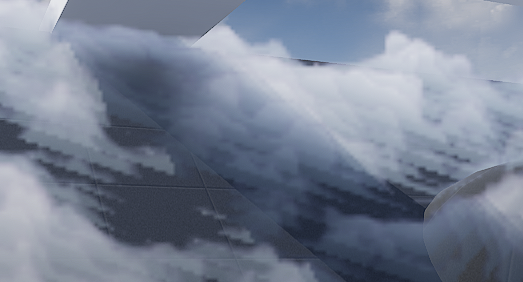
It’s fairly easy to implement the detail fading, just adjust the detail intensity according to DF value (with a power function to adjust contrast). Result is the picture on the right.
Add Detail – Curl Noise (Optional)
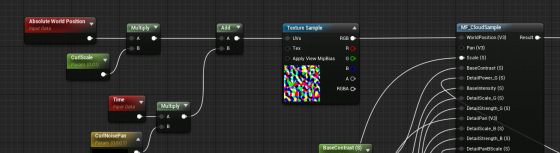
Another great way to add more character to the fog is using divergence-free curl noise to distort the space a little. It gives you stylized curvy dynamics if you cramp it up. Or add some extra curvy flavor if you can afford the extra texture sampling.
There is one under Volumetrics plugin/Content/VolumeTextures/Textures/VT_CurlNoise
Add world position with it before feeding into sampling function.
Shading
Shadow – Offset Shadow
Firstly, volumetric fog doesn’t really support self-shadowing. What we can do is darken the color of input Albedo in the Volume material to fake it. There are downsides, mainly not looking quite correct when inside actual environmental shadows (because we’re still faking shadows for directional light that doesn’t shrine through here) , which can be dealt with by raymarching scene distance field. But let’s leave that for another day.
Offset shadow, in its simplest form, is this:

The text feels solid and leaves a drop shadow on the canvas. Now if the shadow is inside the text and get blurred a little bit we get a softer shadow, which makes it look 3D.

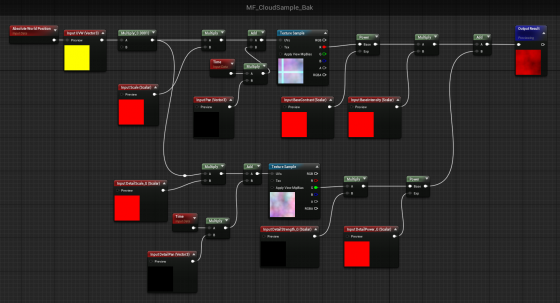
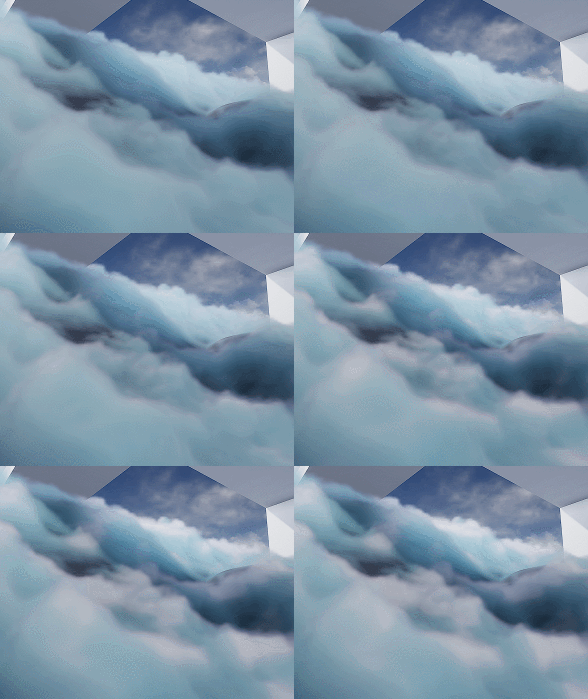
This is exact what we’ll do to the fog. We offset the input World Position A a little toward the main directional light (World Position B) and sample MF_CloudSample again. If B has density of 0, it means there is nothing blocking light to A. A should be colored as a bright color. If B has density > 0, we darken the Albedo of A by how dense B is.

Since UE4 Volumetric Fog implementation already includes temporal jitter, the line between lighted and shadowed isn’t that obvious. You can also adjust the offset length to get a more natural look.
Offset Jitter
Aside from this, I came up with the UseJitteredOffsetShadow method here. Basically you jitter the offset length of every voxel between a range. Temporal super sampling will then smooth it out. There are some artifacts but the result looks quite good. Jitter code inside the Custom Code:
int3 randpos = int3(WorldPosition.xy, View.StateFrameIndexMod8);<br>float rand =float(Rand3DPCG16(randpos).x) / 0xffff;<br>return rand;
Shadow – DFAO
Another shadowing approach that does wonders is distance field ambient occlusion. If you don’t have distance field enabled you can use heightmap as alternative.
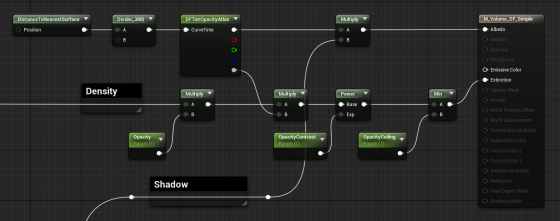
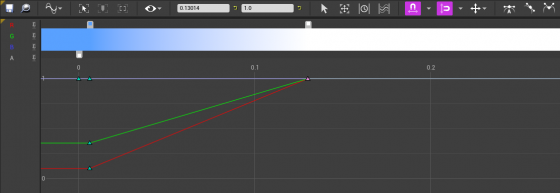
The implementation is simple — tint Albedo darker the closer it is to nearest surface. The Curve Atlas node in the graph above is an awesome engine feature that has come into existence for a while. It automatically generates a small texture from the color curve you edited, including RGBA channel. This makes adjust the DFAO tint and DF opacity influence much faster and more instinctive.
Optimization
I’m still experimenting with ideas like pre-baked scattering, and more efficient way to mask out the empty voxels. For now I’ll mention a few key points.
Since DFAO does a pretty good job in making the cloud cluster distinguishable, you may consider ditching offset shadow since that doubles the sampling cost.
It’s also very important that you understand some of the cvars config for volumetric fog. Volumetric fog is rendered into a 3D texture that will be stretched to fill your vision cone. The depth can be adjusted in ExponentialHeightFog actor – Volumetric Fog – View Distance.
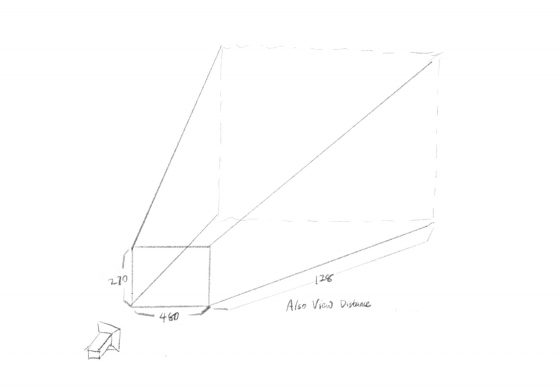
The 3D texture for this project is 480x270x128 (@1080p), as you can see in GPU Visualizer (hotkey ctrl+shift+, )
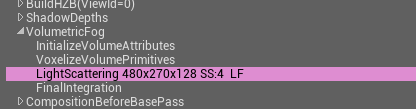
Why? Let’s see the cvars:
r.VolumetricFog.GridSizeZ 128 (default 128)
Is the resolution along the camera depth (Z) axis.
r.VolumetricFog.GridPixelSize 4 (default 8)
Is the screen pixel size per voxel in XY plane. I set it to 4, which means at 1920×1080 resolution, the XY resolution is 480×270.
Click to zoom in
These are the main parameters you can adjust to trade quality for performance very efficiently. Increase gird pixel size to 8 will make it 4x faster.
Also Decrease grid size z to 64 will make it 2x faster, but this will probably result in flickering artifacts. You can try increase
r.VolumetricFog.HistoryWeight (default 0.9)
to reduce the flickering, but the movement will appear more blurred in return. ExponentialHeightFog actor – Volumetric Fog – View Distance can also be decreased to increase quality along Z axis, at the sacrifice of rendering distance.
Finally an optimization I did that yielded noticeable result is using DF value to determine if we should sample textures and calculate output for current voxel at all. Basically you can’t do shader dynamic branching with the If node in material graph, but you can in Custom code. It’s possible to take an Alpha input calculated from distance field, to essentially avoid unnecessary texture sampling operations (and other operations) if current voxel is empty.
[branch]

// Simplified code. Ideally we should immigrate most calculations from the material graph into the if scope

[branch]
if(DF < Alpha)
{
  return float4(
    Texture3DSample(Tex, TexSampler, UVW0).r,
    Texture3DSample(Tex, TexSampler, UVW1).g,
    Texture3DSample(Tex, TexSampler, UVW2).b,
    Texture3DSample(Tex, TexSampler, UVW3).a
  );
}
else
{
   return float4(0.f, 0.f, 0.f, 0.f);
};
срочный вывод из запоя на дому круглосуточно [url=https://narkolog-na-dom-moskva-27.ru]срочный вывод из запоя на дому круглосуточно[/url]
капельница от запоя недорого [url=https://kapelnicza-ot-pokhmelya-samara-38.ru]https://kapelnicza-ot-pokhmelya-samara-38.ru[/url]
поставить капельницу от запоя на дому цена [url=https://kapelnicza-ot-pokhmelya-samara-39.ru]поставить капельницу от запоя на дому цена[/url]
комбинезон размер 80 на какой возраст ребенка [url=https://www.detskie-kombinezony-kupit.ru]https://www.detskie-kombinezony-kupit.ru[/url]
Hi Dear, are you in fact visiting this website regularly, if so after that you will definitely obtain pleasant knowledge.
Just dropping by to say thanks for the effort, it does not go unnoticed when a writer cares this much about the reader, and after I went through learnandapplyfast I was certain this is one of the better corners of the internet for this particular kind of content which is genuinely refreshing.
Reading this confirmed something I had been suspecting about the topic, and a look at globalpremiumfinds pushed that confirmation toward greater confidence, content that lines up with independently held intuitions earns a special kind of trust and I will return to writers who consistently land that way for me without overselling positions.
ии для презентаций бесплатно [url=litteraesvfu.ru]litteraesvfu.ru[/url]
Really like the way the post resists reaching for cliches that would have made it feel generic, and a quick visit to siriustender kept that fresh feel going, original phrasing and unexpected metaphors are signs that the writer is actually thinking rather than just stitching together familiar phrases into the appearance of content.
капельница от алкоголя в стационаре [url=https://vyvod-iz-zapoya-v-staczionare-sankt-peterburg-27.ru]капельница от алкоголя в стационаре[/url]
A slim post with substantial content per word, and a look at createfuturevision maintained the same density, the content per word ratio is something I track informally and this site scores high on that ratio compared to most sources I read regularly which is a quiet indicator of careful editorial work behind the scenes.
бизнес подарок [url=http://www.suvenirnaya-produkcziya-s-logotipom-8.ru]http://www.suvenirnaya-produkcziya-s-logotipom-8.ru[/url]
Quality writing that respects the reader’s intelligence without overloading them, and a quick look at uplandharborvendorparlor reflected that approach, a balanced thoughtful site that earns trust by being consistent rather than by shouting about how trustworthy it is which is the usual approach online sadly across most content categories.
создать презентацию нейросеть [url=litteraesvfu.ru]litteraesvfu.ru[/url]
Just enjoyed the experience without needing to think about why, and a look at buildconfidencefast kept that effortless feeling going, sometimes the best content is invisible in the sense that you forget you are reading until you reach the end and realise time has passed without you noticing it pass naturally.
Skipped past the first paragraph thinking it was setup and had to come back when the rest referenced it, and a stop at jazbox similarly rewarded careful reading from the start, content where every paragraph carries weight is content I now know to read from the beginning rather than skipping ahead.
exotic rentals miami beach [url=luxury-car-rental-miami-1.com]luxury-car-rental-miami-1.com[/url]
Honestly impressed, did not expect to find this level of care on the topic, and a stop at createimpactroadmap cemented the impression, you can tell within the first few paragraphs whether a site is going to be worth the time and this one delivered on that early promise nicely throughout the rest of what I read.
Approaching this site through a casual link click and being surprised by what I found, and a look at createclaritysteps extended the surprise, the rare experience of stumbling into excellent independent content rather than predictable mediocrity is one of the actual remaining pleasures of casual web browsing and this site provided it cleanly.
купить корпоративные подарки с логотипом [url=http://suvenirnaya-produkcziya-s-logotipom-8.ru]http://suvenirnaya-produkcziya-s-logotipom-8.ru[/url]
наркологическая клиника помощь на дому [url=https://narkolog-na-dom-moskva-27.ru]наркологическая клиника помощь на дому[/url]
Worth marking this site as one to come back to deliberately rather than by accident, and a stop at explorefreshapproaches reinforced that intention, the difference between sites I find again by chance and sites I return to on purpose is meaningful and this one has clearly moved into the deliberate return category for me.
Came across this and immediately thought of a friend who would enjoy it, and a stop at discoverfuturepaths also reminded me of someone, content that triggers the urge to share is content that has earned my recommendation and this site has earned multiple from me already across different conversations during the week.
Decided to read more before commenting and the more I read the more I wanted to say something, and a stop at buildlastingimpact pushed that impulse further, when content provokes the urge to participate rather than just consume it is doing something quite specific and worth recognising clearly when it happens during reading.
капельница от запоя на дому [url=https://kapelnicza-ot-pokhmelya-samara-38.ru]капельница от запоя на дому[/url]
A handful of memorable phrases from this one I will probably use later, and a look at hunhax added a couple more, content that contributes language to my own communication rather than just facts is content with a different kind of utility and this site is providing that linguistic utility consistently across what I read.
Все про життя Полтави https://36000.com.ua новини, події, культура, дозвілля та міська інфраструктура. Корисний портал для тих, хто хоче бути в курсі актуальних подій та змін у місті.
On reflection this is the kind of writing that improves my taste for what is possible in the format, and a look at exploreuntappedideas continued raising that bar, content that elevates my expectations rather than lowering them is doing important work in calibrating my standards and this site is participating in that elevation reliably.
нарколог на дому капельница цена [url=https://kapelnicza-ot-pokhmelya-samara-39.ru]нарколог на дому капельница цена[/url]
вывод из запоя на дому в самаре [url=https://kapelnicza-ot-pokhmelya-samara-40.ru]вывод из запоя на дому в самаре[/url]
Bookmark added with a small mental note that this is a site to keep, and a look at explorefreshthinkingnow reinforced the keep status, the verb keep rather than visit captures something about how I think about this kind of site and it is a higher tier of relationship than I have with most places online today.
melbet скачать на андроид [url=https://elenagatilova.ru]melbet скачать на андроид[/url]
melbet [url=https://tcso-begovoy.ru]melbet[/url]
Well done, the kind of post that makes you slow down and actually read instead of skimming for keywords, and a look at drubeat kept me reading carefully too, that is a sign of writing that has been crafted rather than churned out for an algorithm to see today and tomorrow.
Now appreciating that I did not feel exhausted after reading, and a stop at slacktally extended that energising quality, content that leaves me with more attention than it consumed is rare and the gap between draining and energising content is real over the course of a typical day spent reading widely online.
ии презентация [url=http://www.litteraesvfu.ru]http://www.litteraesvfu.ru[/url]
вывод из запоя в стационаре спб [url=https://vyvod-iz-zapoya-v-staczionare-sankt-peterburg-27.ru]вывод из запоя в стационаре спб[/url]
мелбет [url=https://limon-ads.ru]мелбет[/url]
платный нарколог на дом анонимно [url=https://narkolog-na-dom-moskva-27.ru]платный нарколог на дом анонимно[/url]
скачать melbet [url=https://tcso-begovoy.ru]скачать melbet[/url]
melbet [url=https://elenagatilova.ru]melbet[/url]
During a reading session that included several other sources this one stood out, and a look at premiumdesignmarket continued the standout quality, the side by side comparison of sources during research is a useful exercise and this site has been winning those comparisons for me consistently across multiple research sessions during the last week.
выведение из запоя самара [url=https://kapelnicza-ot-pokhmelya-samara-40.ru]выведение из запоя самара[/url]
Approaching this with the usual skepticism I bring to new sites and being slowly persuaded, and a stop at fastbuycorner continued that gradual persuasion, the careful path from skeptical reader to genuine fan is the only one I trust and this site has walked me along that path through patient consistent quality across pieces.
Felt no urge to argue with the conclusions even though I started the post slightly skeptical, and a look at buildactionablemomentum maintained that pattern, writing that earns agreement through clarity of argument rather than rhetorical pressure is the kind I find most persuasive and the kind I want to read more of these days.
рекламно сувенирная продукция [url=suvenirnaya-produkcziya-s-logotipom-8.ru]suvenirnaya-produkcziya-s-logotipom-8.ru[/url]
Reading this on the train into work was a better use of the commute than my usual choices, and a stop at learnbydoing extended that commute reading well, content that improves transit time rather than just filling it is content with practical benefit and this site has earned its place in my morning commute reading rotation.
скачать melbet [url=https://tcso-begovoy.ru]скачать melbet[/url]
I usually skim posts like these but this one held my attention all the way through, and a stop at startwithclearpurpose did the same, that is a strong endorsement coming from me because I am usually quick to bounce when content gets repetitive or fails to deliver on its initial promise made in the headline.
Liked the careful word choice throughout, every term seemed picked for a reason rather than thrown in casually, and a stop at hislex continued that precise style, this kind of attention to small details is what separates careful writing from the usual rushed content that dominates blog spaces today across pretty much every topic I follow.